Before you book any training, it helps to know how it works. What happens first? How is the time split? When do you practise CPR? When are you assessed? Knowing the structure of an Emergency First Aid at Work course in London takes away the guesswork, and it helps you get far more out of the day.
This guide walks through the course from the moment you book to the moment you hold your certificate. Every provider runs things a little differently, so use this as a general picture and always check your own timetable. If you want to see a real course page, here is the Emergency First Aid at Work course in London.
The Big Picture
The Emergency First Aid at Work (EFAW) course is a one day, regulated Level 3 qualification. HSE guidance says it should include at least six hours of training time, not counting breaks. The aim is to prepare you to give first aid in a low-risk workplace.
The course is built like a ladder. It starts with safety and the role of a first aider. It then moves through the most serious emergencies, from the most urgent to the least. Finally, it checks your skills and wraps up. Each step builds on the one before it.
Here is the overall flow:
- Before the course
- Arrival and introduction
- The role of a first aider and staying safe
- Assessing an incident and a casualty
- CPR and using an AED
- The unresponsive casualty and the recovery position
- Choking
- Bleeding and shock
- Minor injuries
- Assessment and questions
- Certificate and next steps
Let us look at each stage in turn.
Stage 1: Before the Course
The structure begins before you walk into the room. A good provider will usually do the following.
- Confirm your booking and send you the date, time and location.
- Explain what to bring, such as photo ID, if needed.
- Ask about access needs, such as mobility, learning needs or health conditions, so the trainer can plan.
- Share the timetable, so you know when breaks and lunch happen.
There is no homework or pre reading for most EFAW courses. You turn up ready to learn.
Stage 2: Arrival and Introduction
When the day begins, you sign in and meet the trainer and the other learners. The trainer then explains how the day will run. This usually covers:
- The timetable and break times.
- Fire exits and safety information for the venue.
- How you will be assessed.
- Ground rules, such as taking part and respecting each other.
This stage is short, often around fifteen to thirty minutes. It sets a calm, friendly tone, so you feel comfortable asking questions later.
Stage 3: The Role of a First Aider and Staying Safe
The first teaching block explains what a first aider actually does. You learn about:
- Your responsibilities and limits.
- How first aid fits into the workplace rules set by the Health and Safety (First-Aid) Regulations 1981.
- Basic hygiene and infection control, such as using gloves.
- How to keep yourself and others safe at an incident.
- The importance of keeping records and reporting accidents.
How it is taught: mostly through short talks and group discussion, with a few examples from workplaces.
Why it comes first: safety and clarity of role come before any skill. If you do not stay safe, you cannot help anyone.
Stage 4: Assessing an Incident and a Casualty
Next, you learn a simple method for handling an emergency. Most trainers use a clear step by step pattern. In plain English, it looks like this:
- Check for danger.
- Check whether the person responds.
- Call for help, including 999 when needed.
- Check the airway and breathing.
- Give the right care.
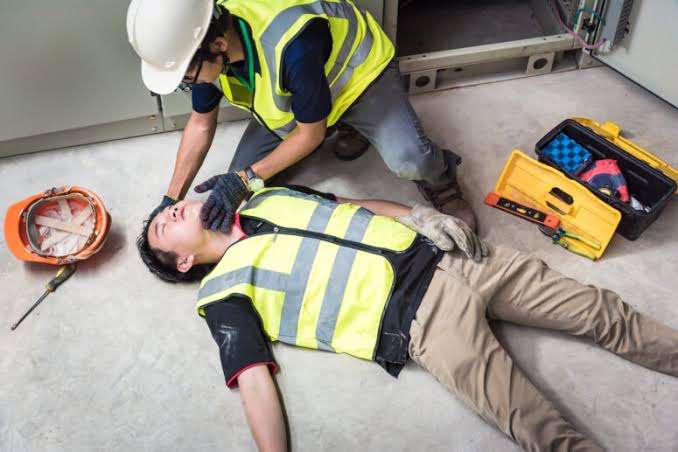
How it is taught: the trainer demonstrates, then you practise in pairs. You may act out simple scenarios, such as finding someone on the floor in an office.
Why it comes early: this pattern is the backbone of the whole course. Every later skill fits inside it.
Stage 5: CPR and Using an AED
This is often the longest and most important block. You learn how to help an adult who is not breathing normally. Topics include:
- Recognising cardiac arrest.
- Calling 999 and asking for an AED.
- Giving chest compressions at the right place, depth and speed.
- Giving rescue breaths.
- Using an automated external defibrillator, following its spoken instructions.
- Working as a team and swapping rescuers.
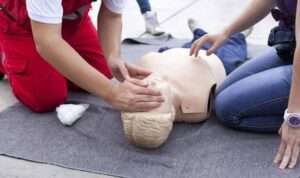
How it is taught: the trainer demonstrates on a manikin. Then you practise yourself, usually several times, with feedback. You also use a training AED, so you get used to the pads and prompts.
Why it is given so much time: CPR and early defibrillation are among the most urgent skills in first aid. Muscle memory matters here, so practice time is generous.
Stage 6: The Unresponsive Casualty and the Recovery Position
The next block covers someone who is unresponsive but still breathing. You learn how to open the airway, check breathing and place the person in the recovery position. You also learn what to watch for and when to be ready to start CPR if things change.
How it is taught: demonstration, followed by practice in pairs. You take turns being the casualty, so you also learn how the position feels.
Why it follows CPR: the two skills are linked. Both start with checking the airway and breathing, and the choice between them depends on what you find.
Stage 7: Choking
Now you learn how to recognise and help a choking adult. You cover:
- The difference between mild and severe choking.
- Encouraging a person to cough.
- Giving back blows.
- Giving abdominal thrusts.
- What to do if the person becomes unresponsive.
How it is taught: the trainer demonstrates the movements and you practise the technique safely, usually on a partner without real force or on a training aid.
Why it is here: choking is a real, common emergency in canteens, cafés and offices. It also links back to CPR if the person stops responding.
Stage 8: Bleeding and Shock
This block deals with heavy bleeding and the body’s reaction to it. You learn how to:
- Control serious bleeding with firm pressure and dressings.
- Recognise the signs of shock, such as pale, cold, clammy skin and a fast pulse.
- Help the casualty stay as safe and comfortable as possible.
- Know when to call an ambulance without delay.
How it is taught: you practise using real dressings and bandages on a partner or a training model.
Why it comes after the airway skills: the usual order of priority is airway, breathing, then bleeding. The course follows that order.
Stage 9: Minor Injuries
The last teaching block looks at the everyday injuries that happen most often at work. These include:
- Small cuts and grazes.
- Minor burns and scalds.
- Minor head bumps.
- Small objects in the eye, where relevant to your trainer’s plan.
You learn what you can safely treat yourself and when to seek more help.
How it is taught: short demonstrations, practical dressing practice and group questions.
Why it is last: these injuries are the least urgent, so the course leaves them until the life-saving skills are covered. Many providers also use this time for a general review.
Stage 10: Assessment and Questions
The assessment is usually spread through the day rather than saved for the end. Your trainer watches your practical skills as you work, and may also ask a few short questions to check your understanding. Typically, they look for whether you can:
- Check for danger and assess a casualty safely.
- Give CPR and use an AED correctly.
- Place an unresponsive, breathing casualty in the recovery position.
- Help a choking adult.
- Control bleeding and recognise shock.
This is not a scary written exam. If something does not go well the first time, a good trainer gives feedback and lets you try again. If you need extra support, tell the provider ahead of time.
Stage 11: Certificate and Next Steps
When you pass, you receive a certificate for the regulated Level 3 qualification. It is valid for three years. The trainer will usually remind you to:
- Keep a copy and give one to your employer.
- Put the expiry date in your diary.
- Think about a yearly refresher, which HSE recommends though it is not a legal rule.
- Find your workplace first aid kit and AED, if you have one.
A Sample Timetable
Every provider is different, but here is a simple example of how the six hours of teaching might be spread across a day.
- 9:00 to 9:30: Welcome and introduction.
- 9:30 to 10:30: First aider role, safety and assessing an incident.
- 10:30 to 10:45: Break.
- 10:45 to 12:15: CPR and using an AED.
- 12:15 to 1:00: Lunch.
- 1:00 to 1:45: Unresponsive casualty and recovery position; choking.
- 1:45 to 2:45: Bleeding, shock and minor injuries.
- 2:45 to 3:00: Break.
- 3:00 to 4:00: Practice, assessment and questions.
- 4:00 to 4:30: Wrap up and certificate details.
Treat this as an example only. Check the real timetable with your provider.
How the Structure Helps You Learn
The course is built using a few smart teaching ideas.
- Most urgent first. The skills that save lives come before the ones that treat small problems.
- Show, then do. You watch the trainer, then you try it yourself.
- Repeat for memory. Key skills such as CPR are practised several times.
- Build on what you know. Each topic links to the last one.
- Check as you go. Assessment is built into the day, so there are no surprises at the end.
These ideas help beginners remember what to do when they are under stress.
EFAW Structure vs First Aid at Work Structure
The three-day First Aid at Work (FAW) course follows a similar approach, but it adds more modules. These cover a wider range of injuries and illnesses and give more time for each topic. EFAW is the shorter version for low-risk workplaces.
As a quick guide, HSE suggests that low-risk workplaces with fewer than 25 employees may need only an appointed person, those with 25 to 50 employees need at least one trained first aider, and larger ones need one per 50 people. Higher risk workplaces usually need the three day course. A first aid needs assessment gives the best answer for your own situation.
What to Look For in a Well-Structured Course
Since structure matters, here are signs of a well planned day.
- A clear timetable shared with you in advance.
- Plenty of hands-on practice time, especially for CPR.
- Enough equipment so no one is waiting for a turn.
- Small groups, so the trainer can give feedback.
- A trainer with real emergency or medical experience.
- A regulated Level 3 qualification from a recognised awarding organisation.
You can review the Emergency First Aid at Work training page to see how a course is described and compare it with this list.
Why Train in London?
London has a huge range of workplaces, and its roads and transport are often busy. In an emergency, the people nearby are the first line of help. There are plenty of venues across the city, and many providers can also deliver on site training, so the trainer comes to your workplace. That can be a smart choice for teams, because everyone learns together.
Final Thoughts
The Emergency First Aid at Work course is built in a clear, logical order. It starts with safety, moves through the most urgent emergencies, such as CPR, choking and bleeding, and finishes with minor injuries and assessment. Along the way, you watch, practise and receive feedback, so the steps stay in your memory.
Now that you know how the day works, you can walk in with confidence. When you are ready to book, take a look at the Emergency First Aid at Work course in London and choose a date that suits you.
Frequently Asked Questions
1. How is the Emergency First Aid at Work course structured?
The course runs for one day and moves through clear stages: the role of a first aider, assessing a casualty, CPR and AED use, the recovery position, choking, bleeding and shock, and minor injuries. Assessment happens during the day, and you receive a certificate at the end.
2. How many hours is the EFAW course?
HSE guidance says the course should include at least six hours of training time, not counting breaks. Most providers run it as a full day.
3. What is taught first on an EFAW course?
The day usually starts with the role of a first aider, safety and how to assess an incident. These basics come first because every other skill depends on them.
4. How much of the course is practical?
A large part of the day is hands on. You practise CPR, use a training defibrillator, place a partner in the recovery position and apply dressings. Good providers give plenty of practice time.
5. When is the assessment on the course?
Assessment usually happens throughout the day. The trainer watches your practical skills and may ask short questions. It is not a long written exam.
6. Can I retry a skill if I get it wrong?
In most cases, yes. A good trainer gives feedback and lets you practise again. The goal is to help you learn the skill safely.
7. Do I need to prepare or study before the course?
No. The course is designed for beginners, and there is normally no pre reading. It helps to wear comfortable clothes, eat well and tell the provider about any access needs.
8. What happens after I pass the course?
You receive a certificate for the regulated Level 3 qualification, valid for three years. You should keep a copy, give one to your employer and note the expiry date. HSE also recommends a yearly refresher.
9. How is the EFAW course different from the First Aid at Work course?
Both follow a similar teaching style, but EFAW takes one day and focuses on emergencies. First Aid at Work takes three days and covers a wider range of injuries and illnesses, so it suits higher risk or larger workplaces.
10. Where can I book an Emergency First Aid at Work course in London?
You can book through a training provider that offers the regulated qualification, either as a public course or as on site training for your team. Check the timetable, the trainer’s experience and what the price includes before you book.